Introduction
Organizing your products by associating them with the correct categories helps customers find what they’re looking for more easily on your customer-facing website. In this guide, we’ll walk you through how to associate item categories with individual products in EZ Process Pro to improve the shopping experience for your customers.
Why Categorizing Items is Important
Associating items with the correct categories benefits your online store:
- Enhanced Customer Experience: Helps customers quickly locate specific products by browsing categories.
- Improved Website Navigation: Organizes your product offerings, making your website easier to use.
- Increased Sales: Makes it more likely for customers to find what they need, potentially leading to more purchases.
Video Walkthrough:
Step-by-Step Instructions
Follow the steps below to associate item categories with items.
Step 1: Log In to the POS System
- Open your EZ Process Pro system.
- Enter your credentials to log in.
Step 2: Navigate to the Add/Edit Group Section
- From the dashboard, go to Getting Started > Add/Edit Groups > Assign Categories to Items.
- This will bring you to the Mapping Item Categories page.


Step 3: Decide to either Display All Items or Items that do not have an Item Category Assigned
- Select either the "Only display items that do not have an item category assigned" or "Display all items" radial option.
- Select a manufacturer
- Optionally you can also type in either the Item # or an Item Description
- Click List Items Below
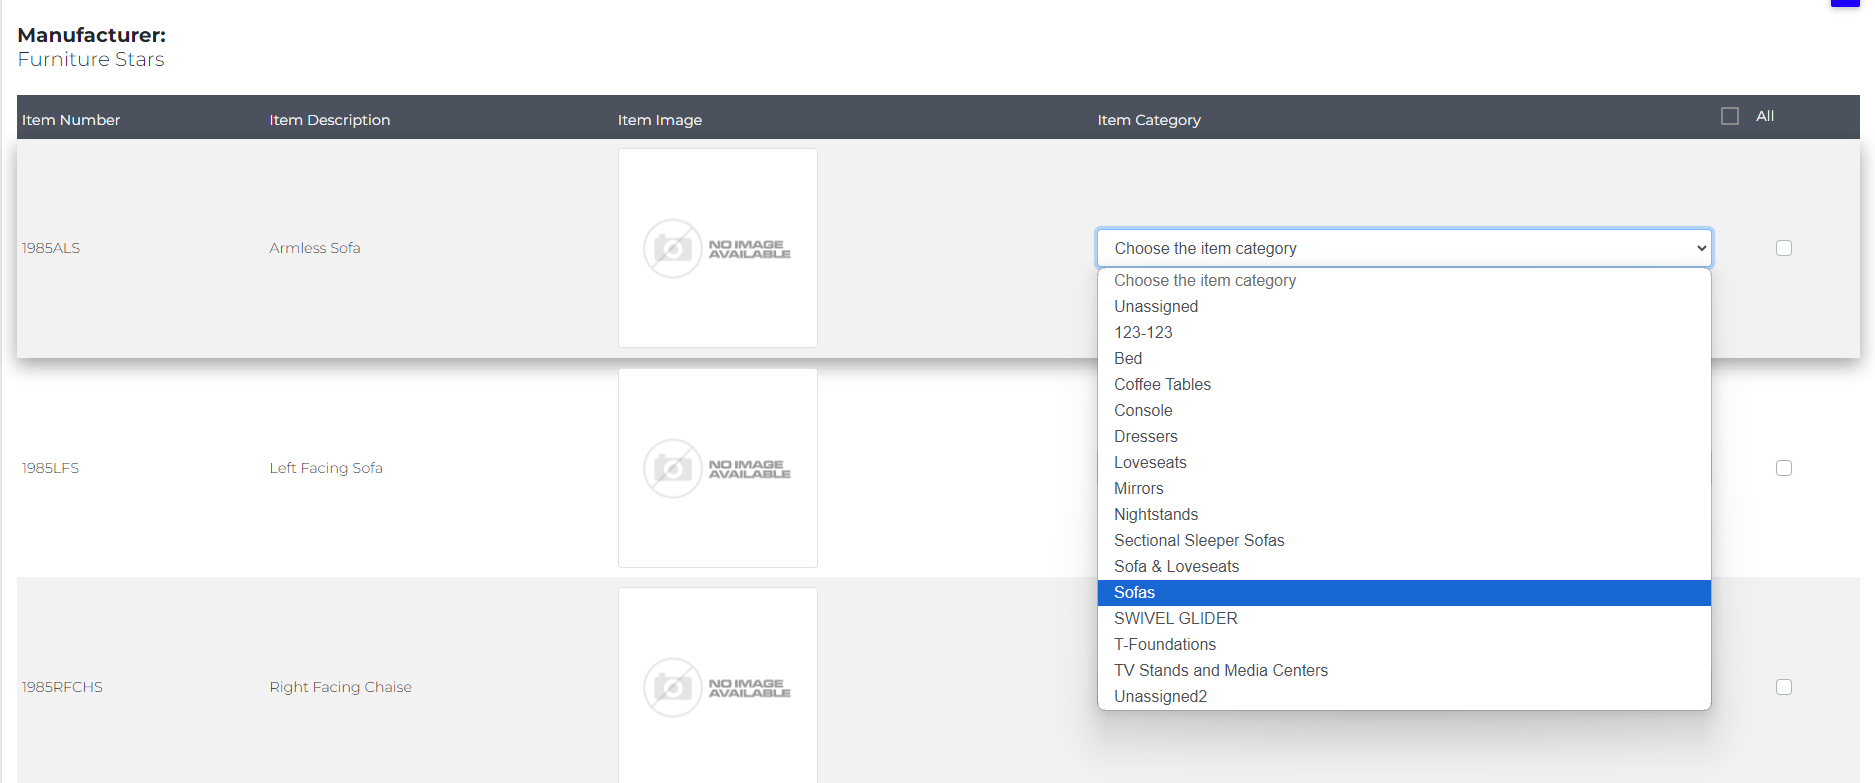
Step 4: Select an Item Category for Each Item
- You now have the option to either select an item category for each of the items individually or mass change multiple items to the same item category. If you would like to mass change multiple items to the same item category then skip to step 5.
- To select an item category for each item individually you will click on "Choose the item category" drop-down menu and select whichever item category you would like to assign to the item.

- You will go down the list and select an item category in this same way for each of the items you wish to assign a new item category.
- When you are finished scroll down to the bottom of the page and click Submit
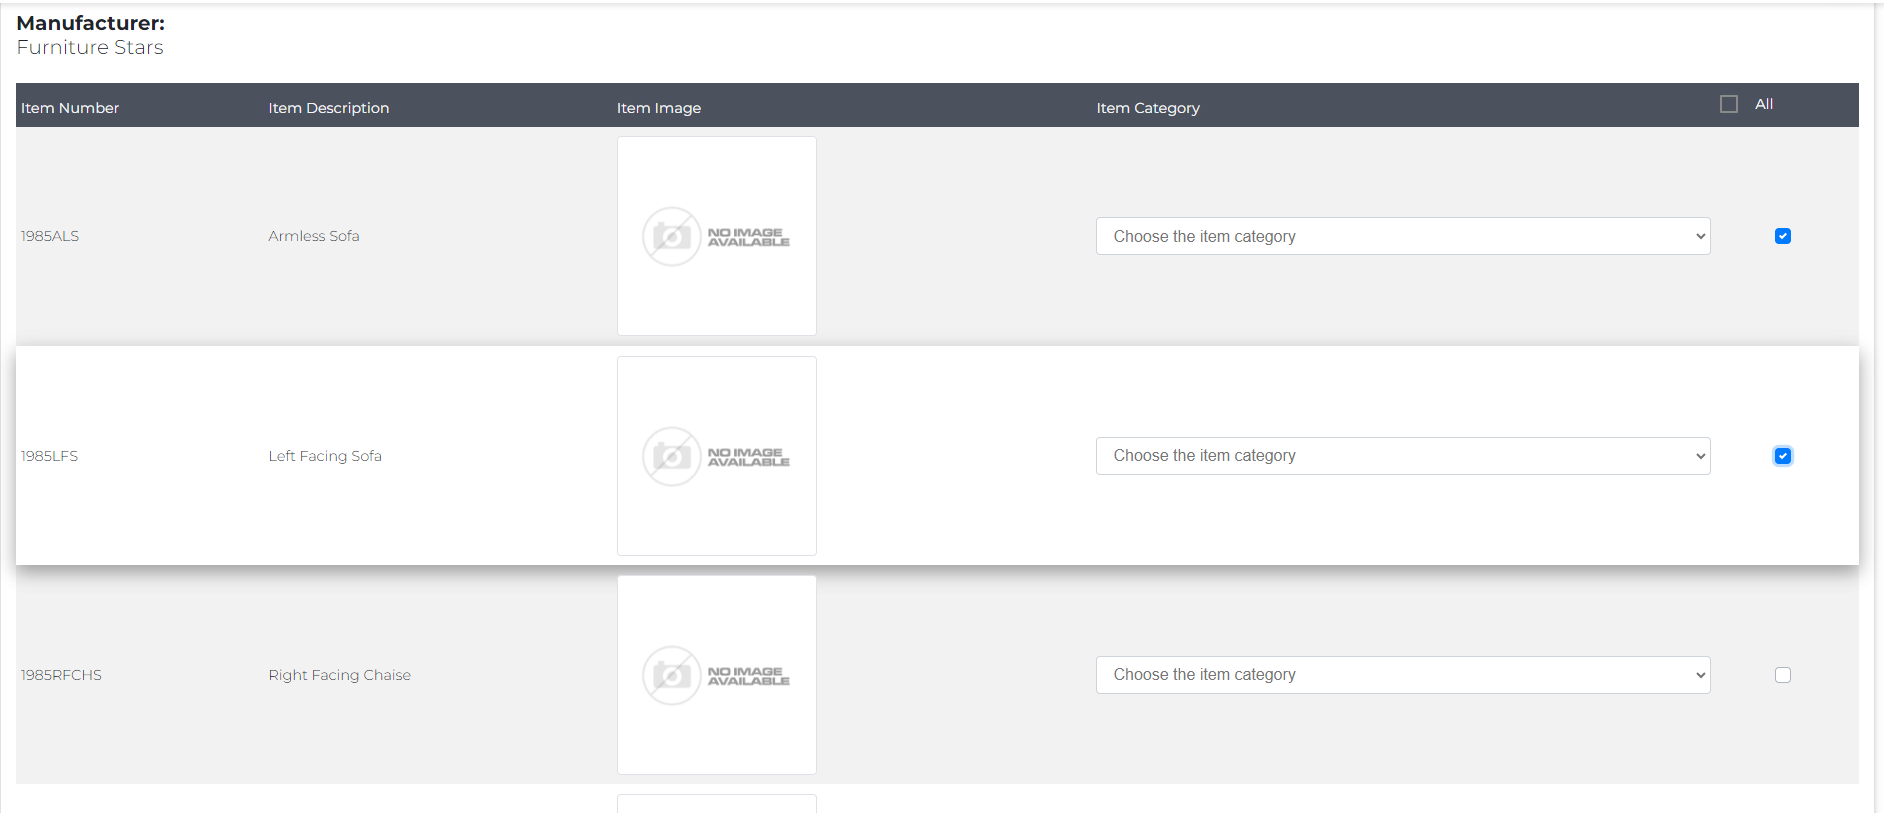
Step 5: Mass Change Multiple Items to the same Item Category
- To assign multiple items to the same item category at one time you will click on the checkbox to the right of each of the items you wish to change to the same item category. Go down the list a check the box for each applicable item.

- You will then scroll to the bottom of the page click on the "Choose the item category" drop-down menu and select the appropriate item category you would like to assign to the selected items.

- You will then click Submit to save your changes.