
When you enable e-commerce on your website, it's essential to configure your delivery zones. Delivery zones allow you to define which zip codes your business delivers to and set corresponding delivery rates for those areas. Follow the steps below to set up delivery zones in your EZ Process Pro system.
Step-by-Step Instructions
-
Login to Your EZ Process Pro System
- Start by logging into your EZ Process Pro account using your administrator credentials.
-
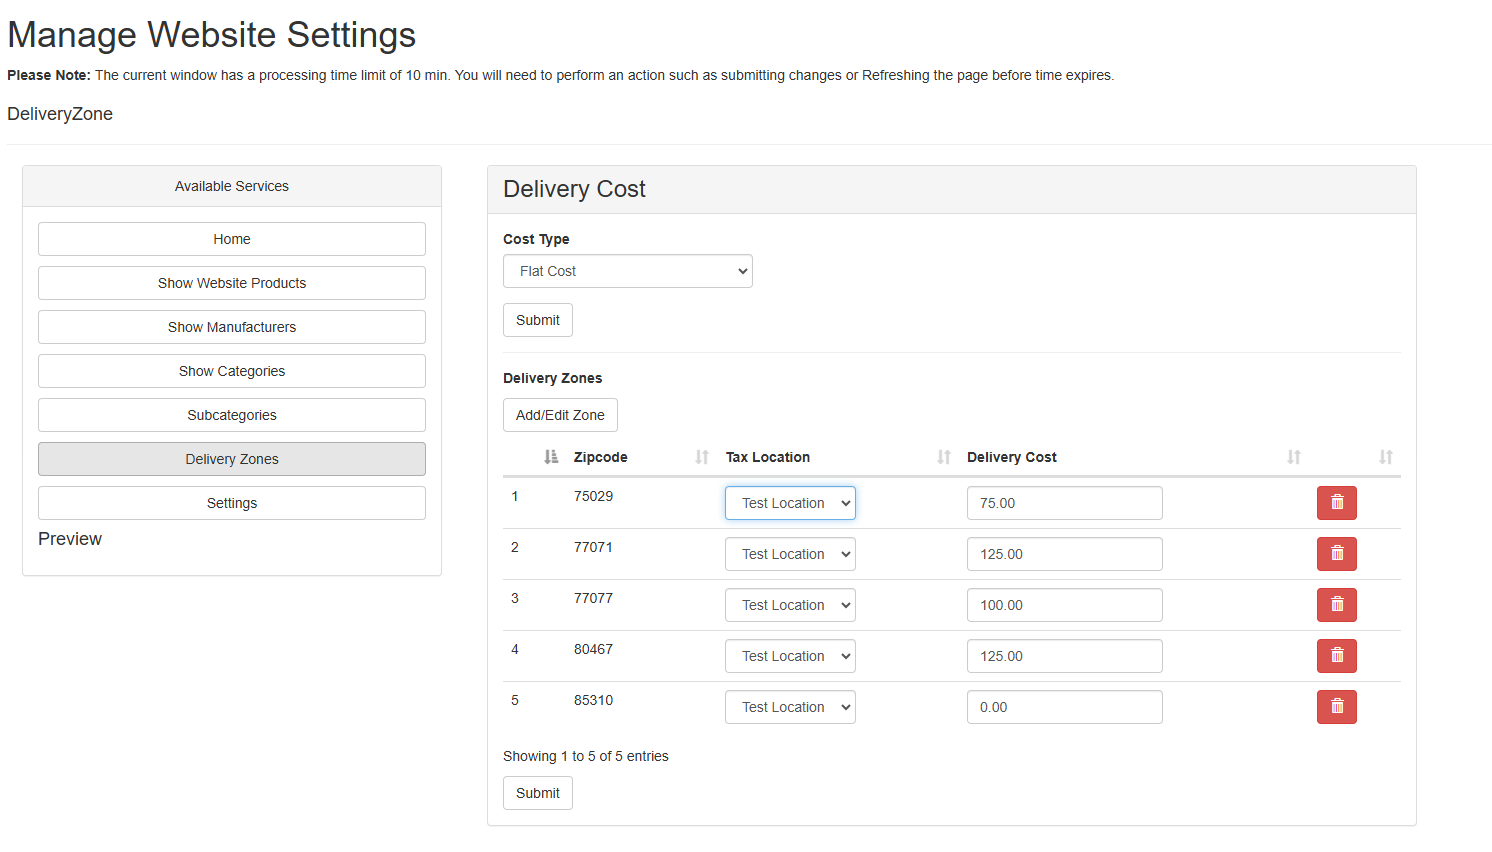
Navigate to Delivery Zones Settings
- Once logged in, go to Getting Started > Website Settings > Delivery Zones.

-
Choose the Cost Type
- In the "Delivery Zones" section, you'll need to select the Cost Type. You have two options:
- Flat Cost: A fixed delivery fee for all applicable zip codes.
- Delivery Rate: A variable delivery fee based on the delivery location.

- After selecting the cost type, click Submit to save your setting.
- In the "Delivery Zones" section, you'll need to select the Cost Type. You have two options:
-
Add or Edit a Delivery Zone
- Click Add/Edit Zone to configure the details of your delivery zone.

-
Enter the Zip Code
- In the field provided, type in the zip code for the delivery zone you wish to add.
-
Select the Tax Location
- Choose the appropriate tax location associated with this delivery zone.
-
Set the Delivery Rate or Cost
- Enter the Delivery Rate or Flat Cost that applies to this delivery zone.
-
Save the Delivery Zone
- Once all the details are correct, click Submit to save your new delivery zone.
Additional Tips:
- Be sure to double-check that the zip codes entered match your delivery areas to avoid errors in delivery.
- For businesses that deliver to multiple areas, repeat these steps for each delivery zone you need to configure.
By following these steps, you'll ensure your website is set up with the correct delivery zones and rates, providing a smooth checkout experience for your customers.