
Video Walkthrough:
🔧 Step 1: Activate ACIMA Integration
-
Go to System Settings > Page 1.
-
Navigate to the Financing Companies section on the right side of the page.
-
Find ACIMA - Integrated and activate it by clicking the Reactivate option.

Please note that once the ACIMA Integration is activated, this automatically locks in the "Do not allow sale price of an item to be $0" System Setting. This setting will prevent users from manually setting an item price to $0 or unintentionally selling items at no charge due to missing price or cost data.
Need to offer free items or package deals?
- Use discount options at checkout, or
- Modify the customer copy of the receipt to hide itemized pricing.
⚙️ Step 2: Switch Integration Type to "Use Full Integration"
Once you have activated ACIMA - Integrated, you will now need to switch the Integration Type to "Use Full Integration". Follow these steps:
- Go to System Settings > Page 1
-
Navigate to the Financing Companies section on the right side of the page.
-
Find ACIMA - Integrated and click on the words "ACIMA-Integrated"
- Now select the radial option for Use Full Integration and click submit.

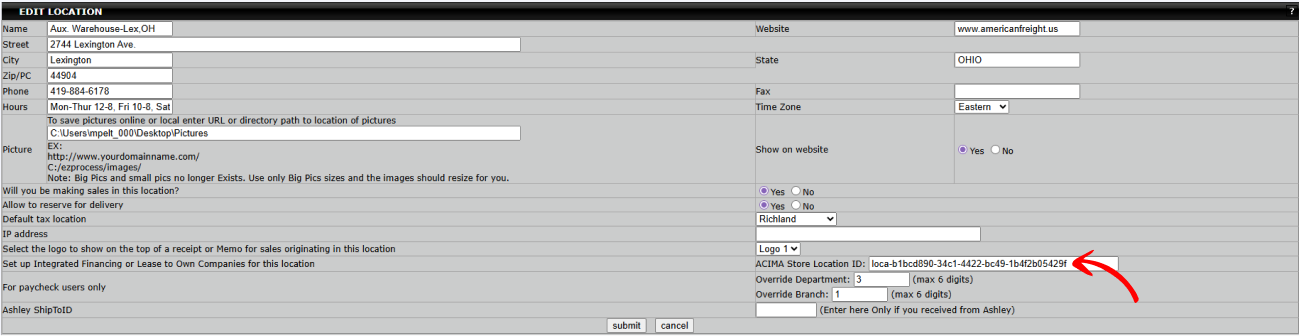
📍 Step 3: Enter Location ID(s)
- For this step, you will need to gather, from ACIMA, the ACIMA Store Location GUID for every location that has the ability to apply for financing.
-
In System Settings > Page 1, go to the Location List section on the left side of the screen.
-
Click on each location you use with ACIMA.
-
Enter your ACIMA Store Location ID in the "Set up Integrated Financing or Lease to Own Companies for this location - ACIMA Store Location ID" field.

-
Save your changes by clicking the submit button at the bottom of the screen.
🧾 Step 4: Submit an Application
You can apply for financing in two places:
Option 1: Within the Customer Profile
-
Go to Sales > Search Customer and either search for or create a new customer.
-
Open their Customer Profile.
- In order to apply for Acima, you must first make sure that the customer has an email address and cell phone number saved in EZ Process Pro.

-
Click the Customer Account: Actions drop-down menu and select View Integrated Financing or Lease to Own Information.

-
A window will appear where you can complete the application.
- Click Start Application to open the application.

- This will now open up the Acima Application Form. You will now either fill out the application on the customer's behalf or have them fill out the application themself. Once finished filling out every field, click Submit Application.

- Please note: EZ Process Pro does not store sensitive high-risk information like bank account numbers, social security numbers, or driver’s license numbers—unless they were previously entered by your team. These fields are transmitted securely and directly to Acima.
-
After submission, a new tab will open showing you the Response from Acima. It will first tell you the status is Pending.

-
You will then click Recheck Status to see the approval result and amount.

- You then have the option to click on the Print button to print out the approved amount and approval code for your customer.
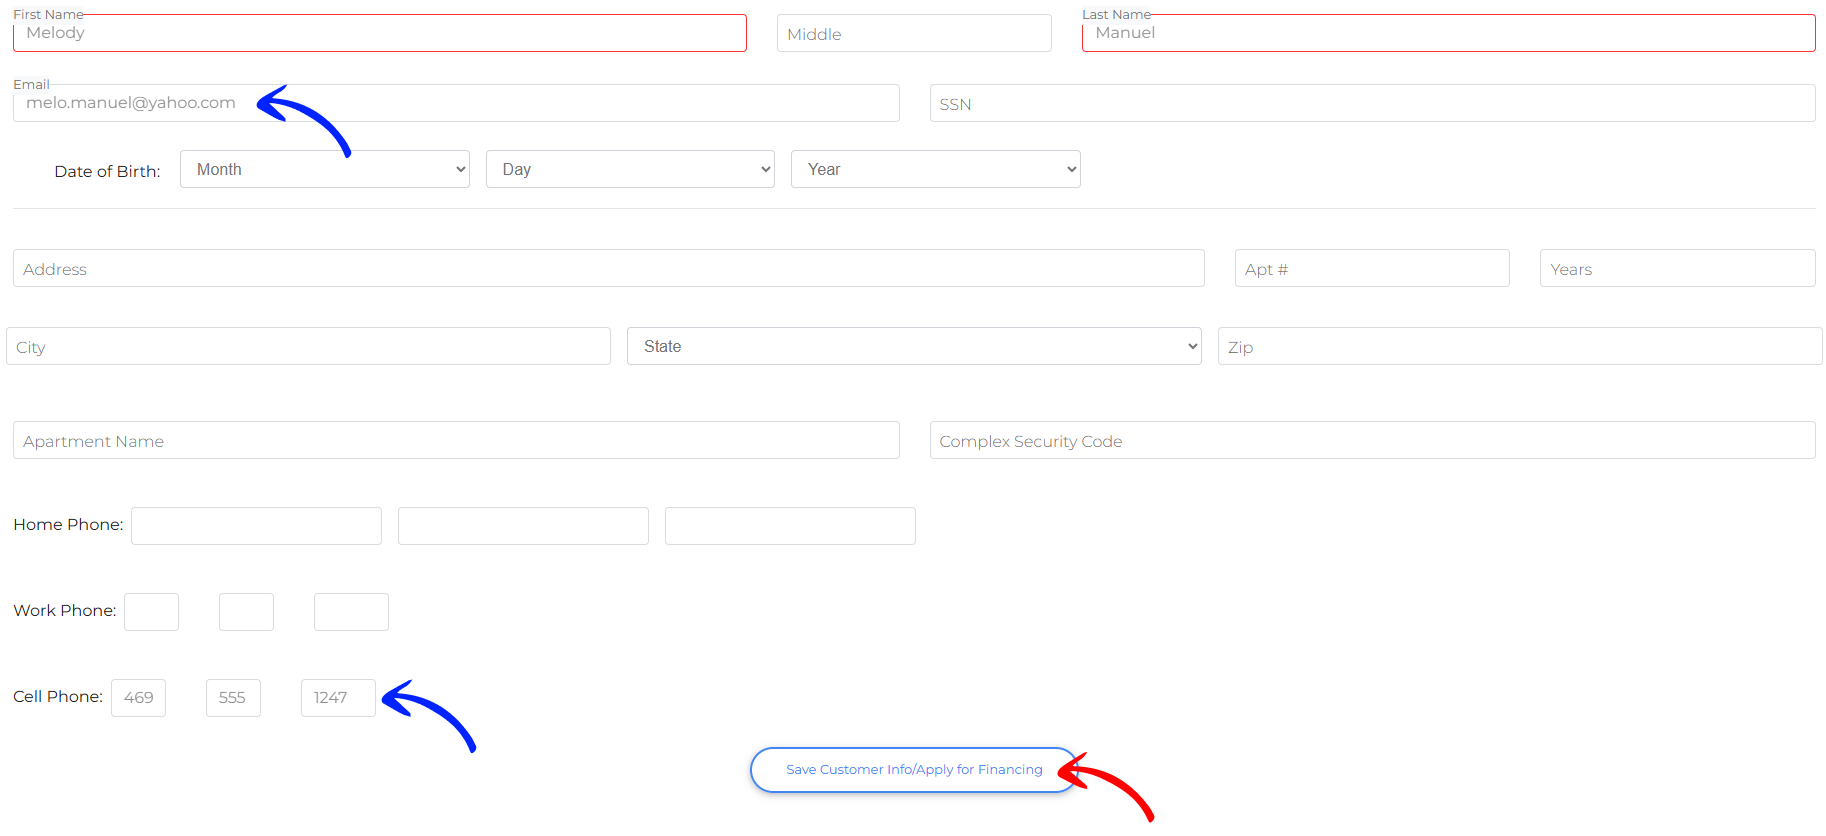
Option 2: During a New Sale
-
Begin a new sale, add items to the shopping cart, and then select Checkout.
-
After entering your new customer's information, make sure an email address and cell phone number have been entered, and then look for the Save Customer Info/Apply for Financing or Lease to Own option and click on that.

- The page will reload, and there will now be a new Apply for Financing or Lease to Own button that you will then click on.

-
A new tab will be opened on your browser that will allow you to start a new application.

- Click Start Application.
-
Complete the application in the pop-up window, and whenever you or your client is finished, click the Submit Application button.

- And remember: EZ Process Pro will not store any sensitive personal or banking information entered during the application process. These details are securely handled by Acima.
- You will now be taken to the response page from Acima.

-
Use the Recheck Status button to refresh and view results.

- You can use the Print option to print out the approval response from Acima.
📊 Step 5: Track Applications
You can track and manage Acima applications using the following reports:
✅ View Integrated Financing Information from Customer Profile
-
Go to Sales > Search Customer
- Search for and open your customer's profile.
- Click on Customer Account: Actions, and then select View Integrated Financing or Lease to Own Information

-
See date of application, approval amounts, amount used, expiration, and current status of application.

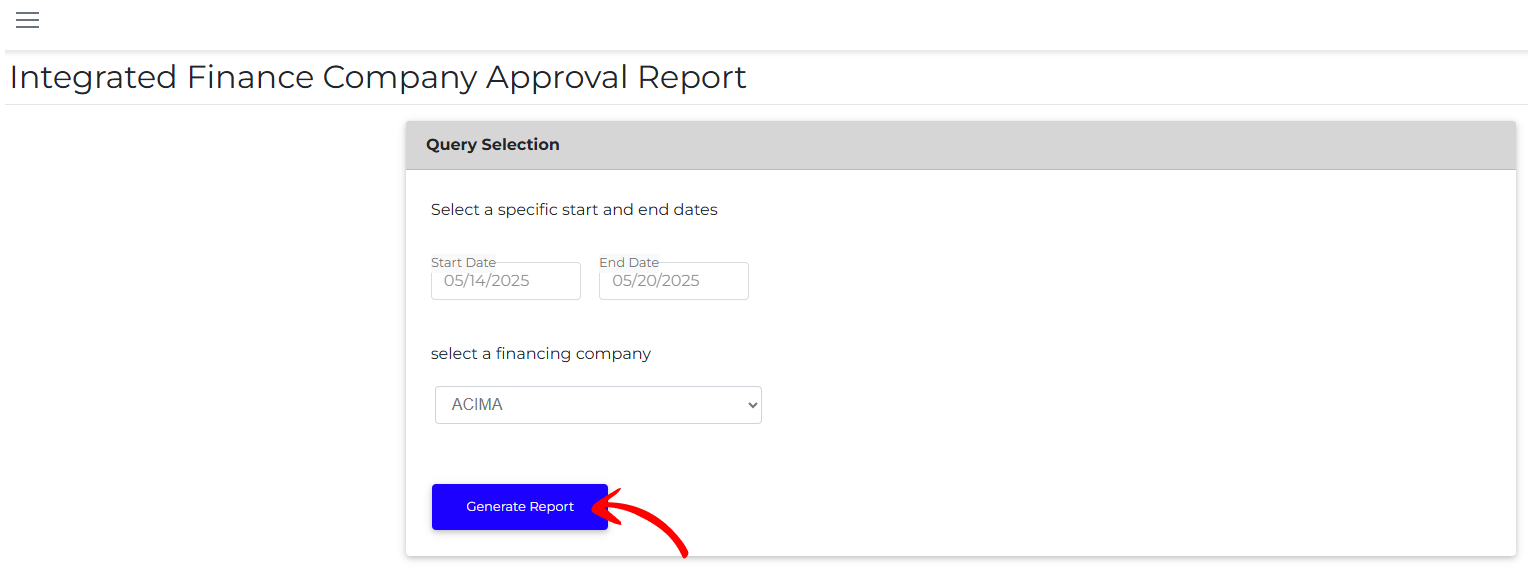
📅 Integrated Finance Company Approval Report
-
Go to Management > Finance Department > View Reports > Integrated Finance or Lease to Own
- You will now select a date range to run the report for and select the integrated financing company.

- You will then click Generate Report to run the report.

-
The report will show you the date of approval, the customer's name, approval amount, amount used, expiration, location of application, sale associated, and whether or not the contract has been signed.

🔒 Step 6: Apply Approval to a Sale
Now that ACIMA has approved your customer for a specific amount, you will create a sale for your customer to apply the amount your customer was approved for.
- Go to Sales > Search Customer and pull up your customer's profile.
- You will then click Customer Account: Actions > Create New Sale
- You will then proceed by adding items to the shopping cart and then proceeding to the checkout screen.
- On the checkout screen, you will see the amount the customer has been approved for and the maximum amount allowed to be collected as a deposit (140%). You can see these amounts in the middle of the checkout screen.

- Next, you will check the box for "No Tax". The reason for this is that this must be a non-taxable sale. This sale is being processed through a lease-to-own financing provider. All payments, including deposits, must go through the financing company, as they are leasing the product back to the customer and will handle the collection of all applicable taxes.

- Now, make sure that the Initial Deposit field is set to $0. All payments, including deposits, must go through the financing company.

- The last step is to add the grand total of the sale to the "Finance Amount" field. The grand total of the sale cannot exceed 1.4 times (or 40% more than) the approved financing amount.

- Now select "IFIN-ACIMA" for the Co Code.

- The Approval Code will automatically fill in.
- You can now proceed with saving the sale as you normally do.
✍️ Step 7: Acima Sends the Customer the Contract to Sign
Once the sale has been saved, the Acima invoicing process will begin, and the status of your customer's application will change to "Needs Signature". You can see this updated status by going to Sales > Search Customer and pulling up your customer's profile, and then selecting Customer Account: Actions: > View Integrated Financing or Lease to Own Information.

Your customer will now be texted the contract by Acima to their mobile phone number. Once they have opened the Acima contract and completed it by signing and paying their initial payment. The status of their application will then change to "Signed".

📦Step 8: Reserve Items for Customer or Add Items to Purchase Order
Once the customer signs the Acima contract, all of the items on the sale will go to Items for PO (Order > Items for PO). This will include even the items that are currently in stock and available. You will now open up Items for PO to reserve in stock items from the appropriate location, or reserve items that are on pending purchase orders, or add items to a new purchase order. Follow these steps:
- Go to Ordering > Items for PO
- Search by the appropriate Sale #
- You will then see a list of items that need to be reserved for the sale.
- If the items are in stock and available you will see a Qty listed within the "Qty Availabe" column. Click Recheck Instock to reserve the in stock item for your customer.

- A new screen will then appear for you to decide which location you would like to reserve the item from.

- For any items that are left that are not in stock, you can either click on the Recheck Order/for Stock option to reserve from an existing purchase order that you have not received, or select a Vendor to add the items to a Purchase Order. You will then go through the normal ordering and receiving process for purchase orders until the item is received into your inventory.
🚛 Step 9: Deliver Furniture and Confirm the Delivery has been Completed
At this point, you will proceed with delivering the furniture and confirm the delivery. You will follow the normal delivery and confirmation process as you always do.
💵 Step 10: Acima Funds Sale
After you have confirmed your delivery, Acima will now pay you, and the status of the customer's application will change to "Funded". Payment from Acima will be automatically confirmed in the software.
